
A coilover kit can look right on the bench and still fail midway through a trail run if the seal stack went in without a controlled pressure sequence. In our factory, 4×4 coilover suspension kits are assembled as a series of measured stages, not as a pile of parts bolted together. I have spent more than twenty years working on shock absorber development and OEM customization, and the difference between a kit that lasts and one that leaks usually comes down to three things: bore finish, seal orientation, and nitrogen charging procedure. What follows is the actual assembly sequence and the checks buyers should ask for.
Component Preparation for 4×4 Coilover Suspension Kits
Every assembly starts with parts that have already been machined, plated, and inspected. For a 4×4 coilover, the shock body and piston rod carry most of the reliability burden because their surface finish controls seal life. We measure bore finish and rod chrome thickness before any component enters the assembly line. A rough bore cuts the seal edge on the first compression stroke. A rod with thin or damaged chrome rusts and tears the shaft seal under side load.
The spring is matched to the damping curve, not picked from a shelf. For off-road kits, the spring rate has to account for vehicle weight, travel, and intended use. The lower spring perch and locking collar are checked for thread fit. If they bind under preload, the installer cannot set ride height accurately. Seal kits, piston bands, and valving shims are cleaned and sorted before the build. Residual machining chips from the body threads are a common cause of early leaks, so we flush each body after threading.
At Yearben, bodies and rods come from our own production lines, and the annual capacity of 1.5 million units keeps the inspection flow standardized. Buyers cannot see the preparation stage in a finished photo, but its failures show up within the first hundred kilometers.
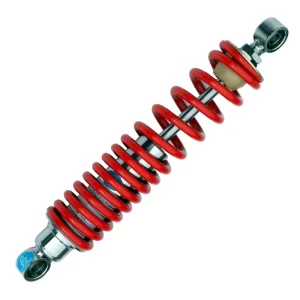
Step-by-Step 4×4 Coilover Suspension Kit Assembly
Once the components pass preparation, the coilover goes together in a fixed order. Changing the order may not stop the unit from bolting up, but it changes the hydraulic behavior.
How the Shock Body and Piston Assembly Go Together
Assembly starts with the piston and valving stack. The piston band is fitted over the piston, and shims are arranged in the order listed on the build sheet. Compression and rebound shim orientation cannot be reversed by mistake; a reversed stack changes damping force even when all parts are present. The piston assembly is torqued to the rod with a calibrated tool, and the rod is inserted through the seal head. We pull a light vacuum during rod insertion so the seal lip seats without folding.
How the Oil Fill and Bleed Are Handled
With the piston in the body, the correct volume of shock oil is filled. This is not a fill-to-the-top operation. The oil level is set by body size and stroke, because too much oil leaves no gas volume and too little oil causes cavitation. After filling, the unit is cycled slowly to purge trapped air from the valving ports. This cycle continues until the damping force stabilizes across repeated strokes. Air trapped behind the piston does not feel like a problem on the bench; it shows up as fading after a few minutes of hard use.
How Coil Spring Preload Is Set
After the damper is closed, the coil spring is placed over the body and the upper spring seat is installed. Preload is set with the lower perch, not by guessing at the collar position. We record ride height and spring length because preload changes how the vehicle sits. For custom orders, the preload range is specified on the drawing before production, so the same setting is repeatable across a batch. Threaded perch quality is one area that separates a serious kit from a decorative one.
How the Nitrogen Charge Is Applied
Nitrogen is charged last, after the oil fill and bleed are complete. The gas pressure is checked against the build sheet, not against a generic shop number. For a remote reservoir coilover, the hose and reservoir are filled and pressure-tested as a closed system. A nitrogen charge that is too low lets the oil foam under repeated impacts. A charge that is too high shortens seal life and changes the force curve. After charging, the pressure is held for a set period to confirm there is no drop at the fittings.
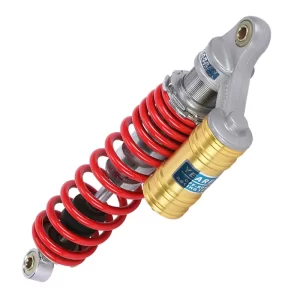
If your program involves a remote reservoir, custom spring rate, or a two-inch body diameter, it is worth confirming the nitrogen pressure and shim stack on the production drawing before finalizing the bill of materials. Reach out at info@yearbenshocks.com with the vehicle weight and travel figures.
Failure Modes in 4×4 Coilover Assembly
The most visible failures on a new 4×4 coilover usually trace back to three assembly oversights, not to a design defect. The first is a folded seal lip. If the rod is inserted without a guide sleeve or with too much speed, the seal edge rolls against the chrome and leaks oil within the first few rides. The second is residual air in the oil. A unit that was not fully cycled during bleed can feel firm in a hand test and then fade badly under continuous load. The third is a nitrogen fitting that was tightened without a controlled torque check. The system holds pressure on the bench but drops gas after a hard day because the fitting settles.
| Failure mode | Typical cause | On-vehicle symptom |
|---|---|---|
| Shaft seal leak | Folded or nicked seal lip during rod insertion | Oil film on the rod, reduced damping |
| Fading after hard use | Incomplete oil bleed, trapped air | Loss of damping after sustained work |
| Nitrogen pressure drop | Loose reservoir hose fitting or fill valve | Soft spring feel, coil rattles |
| Collar bind | Thread damage or contamination | Cannot set preload repeatably |
The table above is not a list of worst-case possibilities. These are the failures I see repeated from rushed assembly, and each one is preventable with a slower insertion step, a longer bleed cycle, and a torque-marked fitting check.
Assembly Consistency Controls at the Factory
Consistency is where a factory separates from a workshop. Assembling one good coilover is not the same as assembling five hundred identical units. We manage this with a fixed work instruction for each model, a first-article sample before batch production, and a tracking record for every rod, body, piston, and spring combination.
The first-article sample is run through the full assembly sequence, then tested for damping force, gas pressure, leak-down, and coil bind. If the sample passes, the build sheet becomes the reference for the rest of the batch. If a later unit falls outside the accepted force range, the line stops until the cause is found. We do not ship units that show an unexplained difference between left and right damping curves.
Damping force testing is not optional. A shock absorber can appear finished and still have a shim stack installed in the wrong order. The only way to catch that is to measure force against velocity on a dyno. We test at multiple speeds because a stack error can pass at one speed and fail at another. The finished kit is then checked for preload position, nitrogen pressure, and visual condition before it enters packing.
For buyers, the practical takeaway is to ask the factory how it handles in-process testing. A supplier that only checks leak-down at the end is not controlling the variables that cause field failures. A supplier that tracks force and pressure during assembly can produce a batch that behaves the same from unit to unit.
Sourcing Assembled 4×4 Coilover Suspension Kits
Sourcing a 4×4 coilover suspension kit is not just about picking a spring rate. The buyer needs to confirm body diameter, stroke, extended and collapsed lengths, mounting type, hose orientation, preload range, and finish before an order is placed. If these are left undefined, the factory will assume standard values and the buyer will find out at installation.
We recommend sending a full drawing or at least the vehicle model, axle weight, travel requirement, and current shock dimensions. From there, the assembly build sheet can be fixed before production. This matters for repeat orders. When the same kit is purchased again six months later, the damping curve and preload should match the first batch, not drift because the production line was rebuilt around a different piston supplier.
The fastest way to get a workable answer is to send the part number, vehicle weight, and quantity to info@yearbenshocks.com. If you need a production lead time or a sample before batch approval, call +86-523-86566899 and state the intended terrain and vehicle platform.
Common Questions About 4×4 Coilover Suspension Kit Assembly
Can I install a 4×4 coilover kit without a nitrogen charging tool?
You can, but the damper will not perform as designed without the specified charge. The nitrogen pressure is set after assembly to match the damping curve and keep the oil stable under load. If the charge is too low, the oil foams and the unit fades. If it is too high, the shaft seal works against extra pressure. A hand pump and a gauge can work for basic setups, but remote reservoir kits really should be checked with a charging setup that matches the hose volume. Otherwise the kit may bolt up and still ride far softer than the build sheet intended.
Is a fully assembled coilover better than separate spring and damper?
The common assumption is that an assembled coilover only saves installation time. The larger difference is that the spring preload and damping curve are set together before shipping. With separate parts, the installer has to match the spring and damper after delivery, and small mistakes show up as ride height errors or mismatched left-right behavior. A fully assembled unit from a controlled line still needs the same quality checks. If the supplier skips force testing, packaging the parts together adds no real value. For a tuned off-road build, the assembly should not be the only reason to choose it.
Why do two identical-looking 4×4 coilover kits feel different?
It depends on whether the supplier controls the build sheet and the in-process testing. Two units can share a body diameter and spring color but differ in shim arrangement, oil volume, or nitrogen pressure. Those differences do not always show up in a static photo. If one unit has reversed compression shims or a folded seal lip, the ride will feel vague or harsh after a few hard miles. The fix is not more branding. Ask for the damping force test record and the nitrogen pressure value for the specific part number before placing a repeat order.
What should I ask a factory before ordering assembled 4×4 coilover suspension kits?
In projects we have supported, the most useful questions cover build sheet control rather than marketing language. Ask how the factory locks body diameter, stroke, preload range, shim stack, oil type, and nitrogen pressure for your part number. Ask whether the first article is tested on a dyno and whether the production batch is checked against that reference. Ask what happens when a unit falls outside the specified force range. A factory that can answer those questions with a process instead of a promise is easier to work with over repeat orders. Send the vehicle weight, travel, and current shock dimensions to info@yearbenshocks.com and we can confirm the applicable validation steps.
If you’re interested, check out these related articles:
Customized Lawn Mower damper 24mm
Heavy Equipment Seat Shock Absorber 38mm