
I’ve seen more ATV shock absorbers fail from oil leakage than from hard impacts on the trail. ATV shock absorber oil leakage doesn’t just cause a mess; it means the damping system is losing the hydraulic pressure that keeps your machine controlled and stable. Over twenty years of shock manufacturing and testing, I’ve learned that most leaks trace back to a few preventable causes — and fixing them quickly can save the shock from complete failure. This article walks through the diagnosis, the most common failure points, and how to decide whether to repair or replace the shock, based on what I’ve observed in the engineering workshop and on OEM production lines.
Why ATV Shock Absorber Oil Leakage Compromises Safety and Control
The oil inside an ATV shock absorber is the working medium that generates damping force. When the piston moves through the oil, hydraulic resistance converts kinetic energy into heat, controlling suspension movement and preventing the chassis from bouncing uncontrollably. Even a small loss of oil reduces the internal volume, introducing air pockets that create inconsistent damping. A shock that has lost 15 to 20 milliliters of its oil will often collapse on rebound or skip over chatter bumps instead of tracking the ground. For riders navigating steep ruts or carrying heavy loads, this translates directly into reduced stability and longer stopping distances. I’ve dyno-tested shocks that appeared only “slightly wet” externally, and the damping force curve showed a clear drop in the low-speed region that governs body control — a loss the rider feels before it becomes visible.
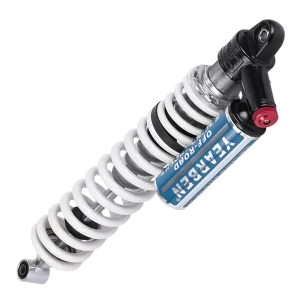
Common Causes of Oil Leakage in ATV Shocks
Oil leaks almost always start at the point where the chrome-plated shaft passes through the oil seal. Over time, even minor imperfections become channels for fluid to escape. From the repair benches I manage, the failures group into four categories.
| Failure Point | Typical Cause | Observable Sign |
|---|---|---|
| Shaft seal lip | Abrasion from dirt, dried or aged nitrile rubber | Oil film on shaft below seal, slight dampness at wiper |
| Shaft surface | Pitting, scoring, or rust from debris impacts | Visible scratches or pits on chrome, oil trail after compression |
| Seal housing or gland | Over-tightening, thermal expansion mismatch | Oil seeping around outer edge of seal body, not shaft |
| Reservoir bladder or piston seal | Fatigue cracking, porosity in rubber | Increase in compression damping harshness, oil mist at reservoir cap |
I have disassembled more than a few shocks sent back from desert races where the shaft was essentially sandblasted by fine silica. Once the chrome layer is compromised, no seal can hold oil for long. In colder climates, we see seal hardening — nitrile rubber stiffens below minus 10 degrees Celsius and loses its ability to follow the shaft surface, creating a path for leakage the moment the shock cycles after a cold start.
How to Diagnose the Source of the Leak
A quick visual check is often enough to point to the failure location, but I always run a simple function test before assuming the shock is scrap. With the shock removed and fully extended, wipe the shaft dry and cycle it through full travel by hand. Watch for oil film left behind. A thin, even film appearing only on the last one-third of the stroke usually suggests a worn seal lip. Oil that appears along the entire shaft in a streaked pattern indicates shaft damage or severe contamination inside the seal housing.
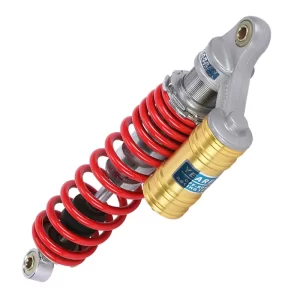
Two adjacent points on the shaft that feel rougher than the rest, even if not deeply pitted, will destroy a new seal within hours. A fingernail dragged across the chrome surface should not catch on anything. If you feel resistance, the shaft is no longer serviceable. Also inspect the seal gland for cracks around the threaded area — I have seen cases where a small overtightening fracture allowed oil to wick past the outer O-ring without ever touching the main shaft seal, confusing the diagnosis. This is more common on monotube shocks where the seal head is pressurized from both sides.
Repair or Replace: Making the Right Decision
Once you have identified the failed component, the decision tree is straightforward. A leaking shaft seal with no shaft damage is a rebuild candidate if you have access to a nitrogen charging setup and the correct seal kit. The rebuild involves disassembling the shock, cleaning all parts, pressing in a new seal, refilling with the correct viscosity shock oil, and recharging the gas reservoir. I recommend using oil specified for off-road shocks — an ISO VG 15 or 22 hydraulic fluid with anti-foam additives, not generic ATF, because the heat cycling in an ATV shock far exceeds what automatic transmissions experience.
If the shaft is scored, pitted, or has lost chrome adhesion, the cost of re-chroming and regrinding a small-diameter shaft often exceeds the price of a direct replacement unit from the manufacturer. In these cases, replacing the entire shock with an OEM-spec or upgraded unit is usually more reliable than chasing a surface finish problem. When I have handled warranty returns on our own production lines, shaft damage represented roughly one-quarter of all leakage claims, and nearly all were accompanied by evidence of the seal lip tearing outward — a sign that debris had already entered the seal cavity before the leak became visible externally. At that point, a simple seal change would not have held.
If your program involves any of these conditions — desert fine sand, frequent mud submersion, or deep snow — it is worth confirming the shaft diameter, hard chrome thickness, and seal material specification with your supplier before ordering replacement units. A shock built for trail riding will not survive repeated exposure to grinding paste without additional shaft protection. Reach out at info@yearbenshocks.com if you are unsure about spec requirements.
Preventing Shock Oil Leaks with Proper Maintenance and Quality Parts
Most oil leaks are not sudden failures; they develop over time from neglect or undersized components. The two highest-value preventive steps I have seen consistently improve shock life are installing a high-quality shock boot or protective guard, and replacing the shock oil and seal as a scheduled service item, not just when it leaks. A boot that seals well at both ends keeps the shaft clean and drastically slows seal lip wear. On our own ATV coilover models destined for rocky terrain, we use a thicker chrome layer on the shaft and double-lip oil seals with a PTFE backing ring that tolerates higher temperatures before deforming. These small material upgrades cost a fraction of a new shock and are worth specifying if you order custom or OEM units.
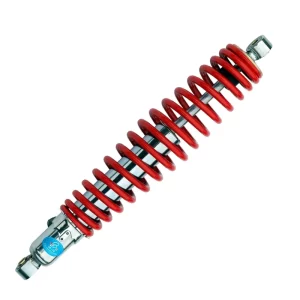
I also advise checking the shock mounting bushings for wear. A worn bushing allows the shock to move off-axis, creating a side load on the shaft that distorts the seal lip and accelerates leakage. This is especially common on rear shocks with heavy spring preload or on machines that carry cargo racks. A shock that looks like it is leaking from the seal may actually have worn bushings causing the oil to weep past a seal that is being twisted out of round on each stroke.
Common Questions About ATV Shock Oil Leakage
Can I ride with a shock that is lightly leaking oil?
You can, but the damping will deteriorate quickly. A small weep reduces oil volume in 5 to 10 milliliter increments, and air that enters the working chamber creates compression spikes and rebound dead spots. On a trail ride, the machine will feel bouncy in the rear or dive too much under braking. In worst cases, the shock piston will cavitate and destroy the valving, turning a rebuild into a full replacement.
Is it cheaper to rebuild a leaking shock or buy a new one?
For a straightforward seal replacement on a shock with a clean shaft, rebuilding costs less, assuming you have the tools and nitrogen charging equipment. The seal kit and oil are often under a tenth of a new shock price. However, if shaft damage is present or the shock body is scored internally, a direct OEM-equivalent replacement from a factory that already builds to your spec is usually more economical than machine work.
What should I do if only one shock is leaking — replace both?
This depends on how old the other shock is. I recommend replacing or rebuilding both front shocks together so the damping forces match side to side. For a rear shock, you can replace it alone, but inspect the other rear unit for seal sweating. If the leak was caused by environmental contamination, the other units likely share the same exposure and may begin leaking soon. Sending us the part numbers for both sides, along with the vehicle model and operating terrain, gives us enough information to propose a matched set that will wear evenly. Contact info@yearbenshocks.com for a balanced replacement plan.
Do Yearben ATV shocks have better sealing than generic replacements?
Our ATV shock absorbers use a double-lip seal design with a PTFE energizer ring and are filled with a nitrogen charge that positively pressurizes the oil chamber, helping the seal lip maintain contact. The shaft plating is a thicker hard chrome layer than many catalog shocks, and the surface finish stays below Ra 0.2 microns. For customers who ride in abrasive conditions, we can also supply protective boots and match the damping curve to your machine, not just the length and eyelet dimensions. Share your ATV model and typical riding terrain, and we’ll confirm compatibility and lead time for a sealed, pressurized shock that fits your use case.
If you’re interested, check out these related articles:
Driver-Seat-Damper-24MM-Cylinder-Diameter
Piggyback-2-0-Coilover-Shock
Ride-on Mower Shock Absorbers 38mm, Shock Absorber Manufacturer
Adjustable Seat Damper 41.5mm