You measure ride height after a season of hard trail miles and the number is a half-inch lower than when you installed them. The first instinct is to crank preload and move on. I have seen this approach create more problems than it solves. Over twenty years of working with coilover manufacturing and failure analysis, the pattern is consistent: height loss is rarely just a preload issue. It is a signal that something inside the coilover has changed. Spring relaxation, nitrogen pressure degradation, and internal seal wear each reduce static height through different mechanisms. If you treat all three the same way, you chase the problem instead of fixing it. This article walks through what actually causes front coilovers to lose height after use, how to distinguish the real cause from the symptoms, and what fixes address each failure mode without creating new ones.
Why Do Front Coilovers Lose Height After Use?
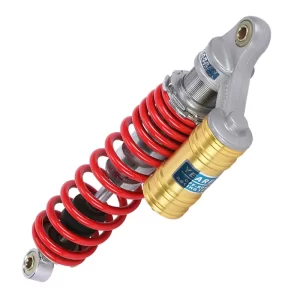
A coilover holds the vehicle at a static ride height through two forces working together: the mechanical spring force pushing upward and the internal gas pressure acting on the piston area. When either degrades, the front end settles lower.
Spring fatigue is the most common long-term cause. Coilover springs are not immune to creep, the slow permanent deformation that occurs in all spring steels under sustained stress. A spring that sees repeated compression cycles at high load, especially in desert racing or rock crawling where heat builds up in the coil, gradually loses free length. I have measured springs that lost 3 to 5 mm of free length after a single heavy season. That translates directly to ride height loss because the preload ring position that once produced a given static force now produces less. The spring rate itself can also shift slightly, typically dropping 1 to 3 percent over the spring’s service life depending on material quality and heat treatment.
Nitrogen pressure loss is the second major cause and the one most riders overlook. Coilover shocks use nitrogen pressure behind the floating piston to prevent oil cavitation and to contribute a small but real extension force. When nitrogen slowly leaks past the seal head or through micro-permeation in the bladder over hundreds of hours, the static extension force drops. A fully pressurized 2.5-inch coilover might contribute 15 to 25 pounds of force at ride height from gas pressure alone. Lose half that pressure and the front end can drop 6 to 10 mm before the spring picks up the load. The pressure loss is gradual enough that many riders never notice it until they compare measurements month to month.
Internal wear compounds both problems. Seal lips that have worn from contaminated oil or high-temperature operation allow more nitrogen bypass. Piston band wear changes the effective damping characteristic but also affects how the shock settles to its static position after movement. A shock with significant piston band clearance may not return to exactly the same static height after cycling. I have seen cases where measured ride height varies 3 to 4 mm depending on whether the vehicle was just driven or sat overnight, purely due to internal leakage paths that change with temperature and oil distribution.
Thermal history matters more than most installation guides acknowledge. Coilovers that run hot, whether from sustained high-speed damping or proximity to exhaust components in some chassis layouts, accelerate both spring relaxation and seal aging. The tempering temperature of the spring steel sets an upper bound for how much heat the spring can absorb before its mechanical properties begin to shift. A spring tempered at 350°C that regularly sees localized temperatures above 200°C from shock body heat transfer will relax measurably faster than one operating at ambient.
How Do You Diagnose Height Loss in a Coilover?
The diagnostic sequence matters because jumping to conclusions sends you down the wrong repair path. I follow the same method with every coilover that comes through our shop: isolate the variables before touching anything.
Start by measuring ride height under repeatable conditions. Same flat surface, same tire pressures, same fuel load, and the vehicle settled after a short drive rather than off a jack. Record the measurement at a consistent reference point. Then unload the front suspension and measure the spring’s installed length with the shock at full droop. Compare that installed length to the free length of the same spring model, if you have the spec, or to a known-good measurement from when the coilovers were new. A spring that has lost free length will show a corresponding loss of preload force even at the same preload ring position.
Next, check the preload setting. Count the turns on the preload ring or measure the spring perch position relative to the shock body. If the perch position has not moved but ride height is lower, something inside the system has changed. The spring lost free length, nitrogen pressure dropped, or internal components shifted their static equilibrium. If the perch has backed off, that is a mechanical issue with the locking mechanism or thread engagement. I have seen preload rings walk under high-frequency vibration when the locking set screw bottoms out on a burr instead of seating flat against the ring.
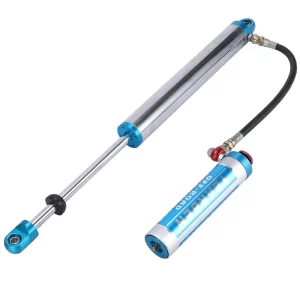
For nitrogen pressure, the reliable method is a needle-type pressure gauge designed for shock service. Thread it onto the Schrader valve or needle port and read the static pressure. Compare to the manufacturer’s specification. A coilover that left the factory at 200 psi and now reads 120 psi has lost meaningful extension force. Be aware that checking pressure with a standard gauge loses a small amount of nitrogen each time. If you are chasing a slow leak, a single pressure check is diagnostic. Repeated checks without a recharge will confuse the data.
Distinguishing spring sag from gas pressure loss takes one additional test. With the coilovers still on the vehicle, measure the distance from the upper spring seat to the lower spring seat at static ride height. Then remove the coilover, set the preload ring to the same position on the bench, and measure the spring’s compressed length at that setting without vehicle load. If the spring’s compressed length at that preload setting is the same as on the vehicle, the spring is not the cause. The height loss is coming from reduced gas pressure or internal wear. If the spring measures shorter on the bench at the same preload setting, it has taken a permanent set.
What Causes More Sag: Spring Fatigue or Gas Pressure Loss?
The answer depends on usage history, but the table below summarizes how to tell which mechanism is dominant in your case based on symptoms.
| Symptom | Spring Fatigue | Gas Pressure Loss |
|---|---|---|
| Height loss when cold vs hot | Consistent in both conditions | Less drop when cold, more when hot |
| Preload ring position unchanged | Height still drops | Height drops proportionally to pressure |
| Ride quality change | Firmer or unchanged | Softer, more bottom-out tendency |
| Recovery after nitrogen recharge | No recovery | Immediate partial or full recovery |
| Spring free length measured off shock | Shorter than specification | Matches specification |
In my experience with coilovers that have seen 100 to 200 hours of hard off-road use, spring fatigue accounts for roughly 60 percent of measurable height loss while nitrogen pressure loss accounts for 30 percent. The remaining 10 percent comes from internal component wear that shifts the shock’s static equilibrium point. These proportions shift with mileage. Under 50 hours, nitrogen pressure loss tends to be the primary cause because springs need time and cycles to accumulate measurable creep. Over 200 hours, spring fatigue dominates and nitrogen pressure has usually stabilized at whatever level the seal system can maintain.
Spring fatigue is a metallurgical process. The spring wire, typically chrome-silicon or chrome-vanadium alloy, operates with a designed stress level that keeps it below the material’s endurance limit for infinite life. But the endurance limit is an idealization. In practice, surface defects from shot peening variability, inclusion content in the steel, and localized stress concentrations at the coil ends all create sites where cyclic loading gradually exceeds the local yield strength. Each compression cycle that pushes the material microscopically past yield at a defect site contributes a tiny increment of permanent deformation. Over tens of thousands of cycles, those increments add up to measurable free length loss.
Nitrogen pressure loss is simpler mechanically but harder to detect early. The nitrogen molecule is small enough to permeate through elastomer seals at a slow rate. A Schrader valve core that holds pressure perfectly at room temperature may leak at 80°C when the shock body is hot and the valve seat material softens. Seal heads with slight shaft misalignment create a helical leak path that opens and closes with each stroke, pumping small amounts of nitrogen out over time. I have tested coilovers where the static pressure held steady for weeks on the bench but dropped 30 psi after a single day of aggressive driving when the shaft was moving and the seals were hot.
If your front coilovers have lost height and a nitrogen recharge restores it immediately, the springs are fine and the seals need attention. If the recharge makes no difference to ride height but the ride quality improves, you have both spring fatigue and pressure loss. In that case, adjusting preload may restore height temporarily, but the damping will still be compromised by low nitrogen until you address the leak.
How Do You Fix Front Coilovers That Have Lost Ride Height?
The fix has to match the failure mechanism. Applying the wrong fix wastes time and can damage components that were still serviceable.
If nitrogen pressure is low and the seals are intact, a recharge is the simplest and least invasive fix. Connect a nitrogen charging system to the Schrader port or needle valve. Pressurize to the manufacturer’s specified static pressure, typically 150 to 250 psi for most off-road coilovers. After charging, cycle the shock through its stroke several times to distribute pressure across the floating piston and check for any immediate pressure drop. Re-measure ride height after a short drive. If height returns to the original setting and holds for the next several rides, the fix was successful.
If the springs have lost free length and preload adjustment still has range available, adding preload can restore height. But there are limits. Adding more than 10 mm of additional preload beyond the original setting changes the spring’s installed characteristics. The spring becomes more progressive in the initial portion of travel, which affects small-bump compliance. I set a hard rule in our shop: if restoring ride height requires more than 8 mm of additional preload beyond the spring manufacturer’s recommended starting point, replace the springs rather than continue cranking. The spring has permanently deformed enough that its rate curve is no longer what the coilover was valved for.
Preload adjustment procedure: loosen the locking set screw or pinch bolt on the preload ring. Turn the ring downward to increase preload. Measure the spring’s installed length as you go. Each full turn of the preload ring on a typical 2.0 or 2.5-inch shock body thread adds roughly 1.5 to 2.0 mm of preload. Record the final preload ring position, spring installed length, and resulting ride height. Tighten the locking mechanism securely. A preload ring that walks under use will undo your adjustment within a single ride.
Spring replacement requires matching the original spring rate, free length, and inner diameter. A spring with the same rate but a different free length changes the preload geometry. A spring with a different rate changes the damping balance. If you are replacing springs, take the opportunity to verify that the current rate is still appropriate for your vehicle weight and usage. Many coilovers are sold with spring rates chosen for a generic vehicle weight that may not match your actual build with armor, winch, and cargo.
When internal wear or persistent nitrogen leakage is present, a full rebuild is the correct fix. A proper rebuild replaces the seal head, shaft seal, wiper, piston band, and floating piston O-ring, followed by a nitrogen recharge. The oil is replaced with fresh shock oil of the correct viscosity. The shaft is inspected for scoring or chrome plating damage that would destroy new seals within hours. I have rejected shafts where chrome peeling at the seal contact area was visible under magnification even though the shaft looked clean to the naked eye. That level of inspection is what separates a rebuild that lasts from one that leaks again in a month.
For coilovers that are losing nitrogen through the Schrader valve itself, replacing the valve core is a two-minute job that can solve a slow leak. Use a valve core tool and a replacement core rated for the pressure range. After replacing, apply a small amount of soap solution to the valve to check for bubble formation. If the leak is through the valve body threads rather than the core, the valve stem may need to be re-sealed with thread sealant rated for high-pressure gas service.
When Should You Rebuild Instead of Adjusting a Sagging Coilover?
Adjustment has its limits. Rebuilding is the right call when the coilover’s internal condition is the root cause of the height loss, not just a contributor.
If you recharge nitrogen and the pressure drops noticeably within three to five rides, the seal system is compromised. Continuing to recharge without addressing the leak is a temporary patch that gets shorter each time as the seals continue to degrade. The cost of repeated nitrogen refills and the downtime of constant ride height checks eventually exceeds the cost of one proper rebuild.
If the shock body shows external oil residue around the seal head, the shaft seal has failed and oil is being pumped out with each stroke. That oil loss reduces the shock’s ability to control damping and changes the internal volume ratio that affects nitrogen pressure behavior. A leaking seal head also allows contaminants into the shock, accelerating wear on every internal component.
If you can feel a dead spot in the damping when cycling the shock by hand on the bench, the piston band is worn or the valving has been damaged. A shock with inconsistent damping cannot maintain consistent ride height because its static equilibrium point shifts unpredictably. This is the hardest symptom to diagnose without removing the coilover, but it explains cases where ride height seems to wander without any change to preload or nitrogen pressure.
The decision comes down to a simple check: if a nitrogen recharge and a reasonable preload adjustment do not restore and hold ride height, and the coilover has more than 150 hours on it, rebuilding is almost always more cost-effective than chasing incremental adjustments. A rebuild restores the coilover to its designed internal clearances and pressure integrity, which resets the baseline for both height and damping performance.
If your front coilovers are sagging and you are not sure whether the issue is spring fatigue, nitrogen pressure, or internal wear, sending detailed measurements and a usage history makes diagnosis more precise than guessing from symptoms alone. Each of the three failure modes has a specific fix, and the wrong fix wastes time and money. We work through these diagnoses regularly with OEM and aftermarket customers. Reach out with your coilover specifications, current measurements, and usage hours at info@yearbenshocks.com or call +86-523-86566899. The right fix starts with knowing which problem you are actually solving.
Common Questions About Coilover Height Loss and Repair
Can I just crank up the preload to fix height loss?
You can, and it may temporarily restore the measurement you want. But preload adjustment without diagnosing the underlying cause masks the real problem. If the spring has fatigued, adding preload increases the installed stress and accelerates further relaxation. If nitrogen pressure is low, adding preload compensates for the lost gas force but leaves the damping compromised by low pressure, which increases cavitation risk during hard use. Preload adjustment is a valid fix only when the spring is healthy and a small height correction is needed. In all other cases, it delays the real repair.
How long should coilover springs last before sagging becomes noticeable?
Quality chrome-silicon springs from reputable manufacturers typically maintain their free length within 2 percent for 300 to 500 hours of mixed off-road use. Budget springs may show measurable sag within 100 hours. The rate of fatigue accelerates with heat exposure, so coilovers that run hot due to sustained high-speed damping or proximity to heat sources will show sag earlier. I track spring free length at each service interval. If a spring loses more than 3 percent of its free length, it gets replaced regardless of how many hours are on it. That threshold catches most failures before ride height becomes a ride quality issue.
Does nitrogen pressure loss always cause a visible height drop?
Not always, and the absence of visible height loss does not mean the nitrogen system is healthy. A coilover that started at 250 psi and dropped to 180 psi has lost meaningful gas force, but if the spring rate is stiff enough relative to the vehicle weight, the visible height change may be 3 mm or less, which is within measurement error for most riders checking ride height in a garage. The more significant effect is on damping consistency. Low nitrogen pressure reduces the force required to move the piston, which changes how the valving responds to small inputs. You may feel the degradation in ride quality before you measure it in ride height.
What manufacturing quality factors affect long-term height retention?
The spring material and heat treatment process are the dominant factors. Springs made from vacuum-degassed chrome-silicon wire with controlled shot peening and proper stress relief hold their dimensions far longer than springs from non-vacuum steel with inconsistent heat treatment. On the shock side, seal head design and shaft surface finish determine nitrogen retention over time. A shaft with a surface finish below Ra 0.1 microns and a double-lip seal head with a proper grease pack between the lips will hold pressure for hundreds of hours. I have seen coilovers from factories that skip the shaft superfinishing step leak nitrogen within 50 hours because the seal lips abrade against microscopic surface peaks.
Is height loss always a sign the coilover needs a full rebuild?
No. Height loss from spring fatigue alone does not require a rebuild if the shock body is holding pressure and the damping feels consistent. In that case, spring replacement with proper preload setting resolves the issue. Height loss from nitrogen pressure loss may need only a seal head replacement and recharge if the internal oil is clean and the piston band is within tolerance. A full rebuild is appropriate when internal wear is present alongside height loss, which is common at higher hour counts but not universal. If you are uncertain whether your coilovers need springs, seals, or a full rebuild, sharing your current measurements and service history helps narrow the diagnosis. We work through these evaluations regularly with shops and individual riders. Send your coilover specifications and measurements to info@yearbenshocks.com and I will help you figure out which repair path matches what the symptoms are telling you.
If you’re interested, check out these related articles: