A hydraulic damper leaking oil rarely fails all at once. Leakage starts as a damp ring around the shaft, a faint sheen on the body, or a slow pressure loss that only shows up as softer damping. In two decades of building and testing dampers for ATVs, seats, and steering systems, I have found that most oil leaks trace to three problems: a damaged or contaminated shaft sealing surface, seal material that cannot tolerate the fluid and temperature range, or side loading and pressure spikes the original design never anticipated. The right repair depends on which of the three is present, and swapping the damper before that diagnosis usually repeats the failure.
Shaft Seal Damage Behind Most Hydraulic Damper Oil Leaks
The rod seal is a lip that rides the chrome plated shaft on every stroke. It scrapes most of the oil back into the working chamber while a thin film remains to lubricate the lip. That film is normal. A visible bead that forms after every cycle and runs down the shaft or the outer body is not. I have torn down dampers with several hundred hours where the rod was clean and the seal lip had hardened from heat, and I have seen units leak within days because the shaft itself was pitted or the chrome had peeled at the seal line.
The shaft surface does more work than the seal. A lip can only follow what the rod gives it. If the plating wears through to base steel, corrosion starts, and the micro pitting that follows chews the lip like sandpaper. Most field leaks at the rod guide are not a bad seal batch. They are a shaft surface that failed first, and the seal is simply the part that shows the symptom.
How Much Oil Seepage Is Acceptable?
A light, dry looking oil film near the rod guide is generally acceptable on a hydraulic damper in steady service. A wet bead that stays at the lip and does not fall is the early stage of leakage, so monitor it. A drip, a split wiper, or oil spreading across the outer body means the unit should come out for diagnosis before it returns to service. If the damping action has also gone soft or uneven, the leak has already cost oil volume and the damper needs attention no matter how small the spot looks.
Reading the Leak Pattern to Find the Failed Component
Record where the leak shows up and when it appears before ordering anything. A leak at the rod guide points to the shaft seal, the wiper, or the rod surface. A leak at the body joint points to a static O-ring or a distorted housing. A leak that only appears after long runs points to heat, pressure, or aeration rather than a worn part. Those differences decide whether you reseal, revalve, or replace.
| Leak Indication | Most Likely Cause | First Inspection | Repair Path |
|---|---|---|---|
| Oil ring at rod guide with no drip | Seal lip wear or hardening | Rod surface for scoring or chrome wear | New seal set if the rod is clean |
| Constant drip with dark or milky oil | Water ingress or fluid breakdown | Oil condition and wiper | Flush, refill, and replace seals |
| Wetness at body joint or end fitting | Static O-ring set or loose joint | O-ring groove and joint torque | Reseal or retorque, then retest |
| Leak only after hard operation | Pressure spike or cavitation | Damping curve and valve stack | Revalve or raise the peak rating |
| Chrome peeling or shaft pitting visible | Plating adhesion failure | Surface roughness at the seal line | Replace the rod or the complete damper |
Side loading concentrates wear on one side of the lip and the rod. When a damper mounts at an angle or absorbs off center load from a pivoting seat or steering linkage, the shaft pushes against the guide bushing and the seal runs dry on the loaded side. The leak then starts as one sided wetness. Straightening the linkage or adding a spherical bearing mount changes the failure mode more than a stronger seal can.
What Does Side Loading Look Like at the Shaft Seal?
Side loading leaves a wear band around one side of the rod, usually opposite the load path. The seal lip flattens where it rode the rod, and the guide bushing wears oval. If the leak appears on one side only, or the rod shows a polished band on a single arc, the root cause is geometry rather than the seal. Correcting the mount angle or adding a bearing cleans the load path and stops the wear.
Manufacturing Choices That Create Leaks Before Installation
Factory decisions set the leak risk long before a unit ships. Three stand out when I audit a failed damper: rod chrome quality, seal compound selection, and assembly cleanliness. If the chrome plating is too soft, too thin, or poorly bonded, it micro cracks at the seal line and begins cutting the lip. If the seal compound was chosen for cost rather than compatibility with the customer’s fluid, the lip swells, shrinks, or hardens in service. If a shaft ships with grinding grit or dust still on it, that debris embeds and scores both the rod and the lip.
Yearben runs incoming rod surface checks and final leak tests on hydraulic dampers before packing because those two gates catch most warranty failures. The rod is checked for surface roughness and plating adhesion before seal fitment, and each assembled unit is cycled at working stroke to look for wetting at the rod guide and body joints. A supplier that cannot show this test documentation is guessing at leak performance.
If the damper running in your application sees sustained heat or off center load, confirm the shaft surface specification and seal compound with the supplier before you place the next replacement order. Send the failed unit details to info@yearbenshocks.com.
Repair or Replacement Based on Damage Evidence
The decision between a seal rebuild and a full replacement follows the rod condition. If the chrome surface is clean and the leak is limited to a hardened or cut lip, a new seal set and fresh oil bring the damper back without machining. If the rod shows scoring, chrome peeling, or pitting that catches a fingernail, a rebuild will leak again because the new lip runs over the same damaged surface. The failure repeats.
Heat history matters as well. A damper that ran low on oil from a long standing leak may also have scored the piston bore or overheated the valve shims. In that case the shaft seal is only the first visible symptom, and paying for seals without inspecting the full stack is poor money. Open the damper before quoting the repair.
When Is a Rebuild Cheaper Than a Replacement?
A rebuild wins when the housing, rod, and bore are undisturbed and only the seal package is worn. Seals cost little next to a complete unit, especially for larger diameter seat or steering dampers. When the rod needs rechroming or the bore needs honing, total cost moves near a new unit and lead time grows. For high volume programs, replacement with a current production damper usually wins on consistency. For one off specialty units, a rebuild is often the shorter path.
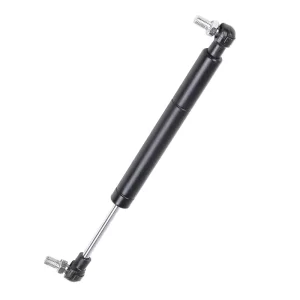
Specifications That Keep the Next Hydraulic Damper Dry
When you source the next batch, ask for the specification behind the seal, not just the seal name. A rod drawing should state plating type, thickness, and final surface roughness before assembly. The seal package should name the compound and its compatibility range for the oil you run. The factory should be able to state its leak test method, stroke, pressure, and pass fail criteria. If those three items are missing from a quote, treat the gap as open risk.
For hydraulic dampers on seats and lawn mower steering systems, put the operating angle and load into the specification sheet. A damper that passes a vertical bench test can still leak when mounted at an angle with side load, so specify the actual installation angle and ask the supplier to cycle the test at that angle. That one line removes most surprises.
Recurring leaks mean the failure mode has not been closed. If your current supply keeps wetting shafts or losing damping force, stop accepting replacements without a root cause. Send the failed damper photos, shaft condition notes, and application details to info@yearbenshocks.com or call +86-523-86566899, and we will confirm the rod finish specification, seal compound, and leak test acceptance that fit your service before you commit to the next order.
Common Questions About Hydraulic Damper Oil Leaks
Can a Hydraulic Damper That Is Seeping Oil Still Be Used Safely?
A light oil film is not an immediate safety failure, but a visible drip means the damper has already lost fluid and should be pulled from service. The real risk is not the oil on the floor. It is the drop in damping force that arrives when the working chamber runs low, especially on a seat or steering system where control is the whole function. Keep using a leaking unit only for very light duty, and only while a replacement is already on order.
Does Cold Weather Cause Hydraulic Damper Seals to Leak?
Cold weather does not create leaks by itself. It exposes a seal that already lost elasticity or a rod already running at the edge of clearance. At low temperature the oil thickens, start up pressure climbs faster, and a borderline lip can wet until the unit warms. If cold weather leaks disappear after a few cycles, the seal is the weak point. If they persist, check the shaft surface and the seal compound against the cold temperature range.
Is It Better to Rebuild or Replace a Leaking Hydraulic Damper?
It depends on the rod condition and the damper design. If the shaft is clean and the leak is at the seal lip, a rebuild with a matched seal set is usually enough. If the chrome is scored or peeling, replacement is the lower total cost because the new lip would wear on the same damaged surface. For high volume production dampers, replacement makes sense. For a specialty one off unit, rebuild after a bore and rod inspection.
How Are Hydraulic Dampers Leak Tested at the Factory?
On our production line we cycle the damper at working stroke and hold pressure to check for wetting at the rod guide and body joints. The pass line is not a dry shaft. It is a controlled film with no bead, no drip, and no pressure drop beyond the rejection limit. That test runs after assembly and again on a sampling basis before packing, so a leaking unit leaves the line only if the process missed a damaged part. If your incoming inspection requires a defined leak test pass fail level, share that specification and we will confirm the test protocol matches your documentation.
If you’re interested, check out these related articles:
Fixed-Preload-Atv-Shock-Absorbers
Remote-Reservoir-Shocks-Manufacturer